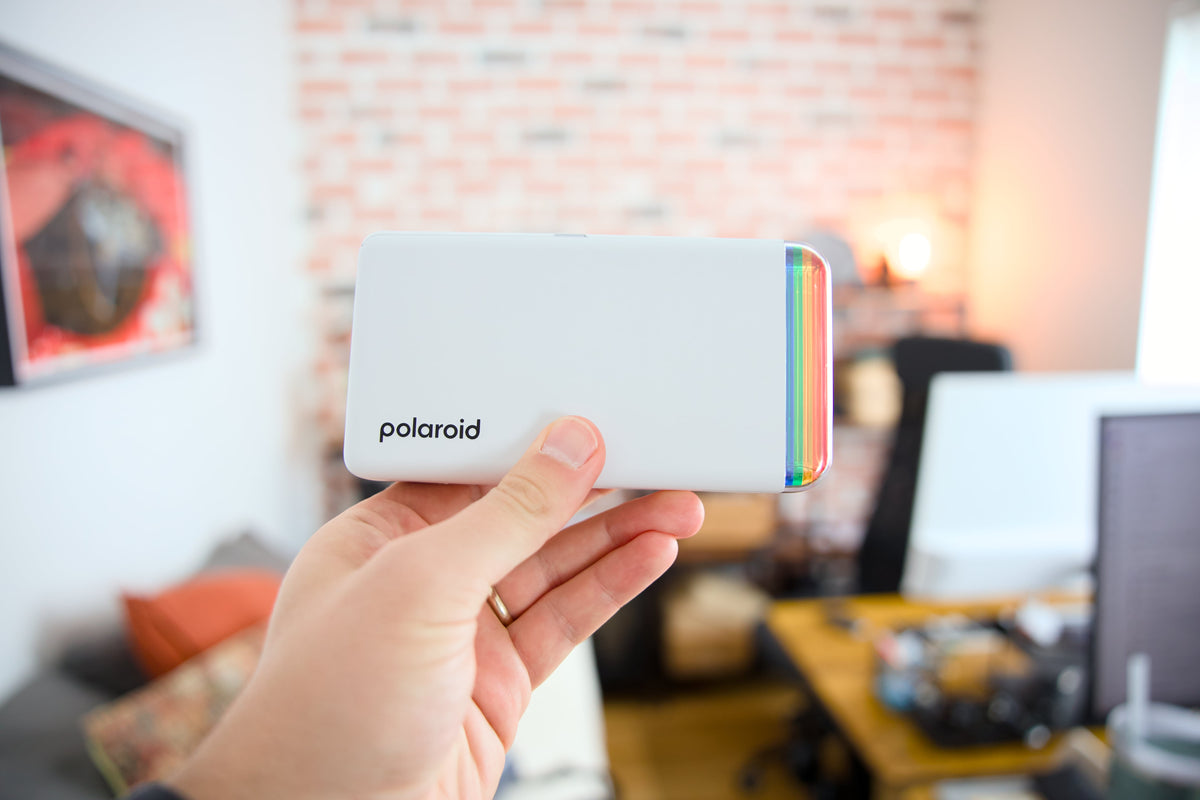
This one started as a Mother's Day gift, not a gear purchase for the channel. Bianca and I bought the Polaroid Hi-Print with our own money, no sponsorship, and it sat in a backpack for months before we actually tried it. The video below is us using it together for the first time: unboxing, pairing it over Bluetooth, and printing a couple of photos to see what we'd get.
What we got was a print that didn't match what we expected from a photo shot on a Canon R6 Mark II. Softer than the file, and with a color cast that showed up mainly in the whites. My first instinct on camera was to blame the comparison itself, since holding a small dye-sub print next to a professional lab print felt unfair. After looking into how these pocket printers actually work, I don't think unfair is the right word. There's a specific, explainable reason the print looked the way it did, and it has nothing to do with how many megapixels the source photo had.
That's what this post is for. Watch the video for the actual unboxing and the side-by-side reactions. This post is the explanation of what was happening technically while we watched that print roll out.
What the Hi-Print actually promises
The Polaroid Hi-Print is a Bluetooth-connected pocket printer that uses dye-sublimation, not the Zink "zero ink" thermal paper you'll find in cheaper novelty printers like the original Polaroid Zip or the HP Sprocket. Dye-sub is a real step up: a four-pass thermal transfer process that lays down cyan, magenta, and yellow dye in sequence, then finishes with a clear protective overcoat.
The specs, for the 2nd generation model we have:
| Spec | Value |
|---|---|
| Print technology | Dye-sublimation, 4-pass (Y-M-C + overcoat) |
| Max resolution | 291 x 291 dpi |
| Print size | 2.1 x 3.4 in (54 x 86mm), self-adhesive |
| Connectivity | Bluetooth |
| Battery | Rechargeable, USB-C |
| Weight | 255g |
| Price | Roughly $100 to $140 depending on bundle |
On paper, that's a legitimate photo printing process, not a toy. The prints are also genuinely water-resistant and don't smudge, which the Zink alternatives can't claim as convincingly.
The resolution math nobody puts on the box
Here's the thing that actually matters, and it's not on any spec sheet in a way that means anything to a photographer: 291 dpi across a 2.1 x 3.4 inch print works out to about 611 x 989 pixels. That's roughly 0.6 megapixels.
The Canon R6 Mark II shoots a 24.2-megapixel file. So the printer is working with less than 3% of the pixel data your camera is capable of capturing, and that's true whether you shoot at f/2.8 on the RF 24-70mm or any other lens in your bag. The mismatch isn't small, and it means resolution was never going to be the bottleneck here. A printer maxing out at 0.6 megapixels doesn't care whether the source file is 24 megapixels or 60. Both get downsampled to the same few hundred thousand pixels before a single dye pass happens.
That's actually good news in one sense: you don't need to shoot anything special to feed this printer. But it also means the softness we saw on camera isn't a resolution story, so it has to be something else.
So what's actually causing the softness and the color shift
Two things, and neither of them shows up in a spec sheet.
The dye-sub process itself has a physical softness ceiling. Unlike an inkjet printer laying down discrete droplets, or a photo lab exposing light-sensitive paper, dye-sub works by heating a ribbon so the dye sublimates (turns to gas) and diffuses directly into the paper's coating. That diffusion process inherently blooms a little at the edges of fine detail. It's part of why dye-sub prints have that smooth, almost photographic surface with no visible dot pattern, but it's also why dye-sub has never been the technology of choice for maximum sharpness, even on higher-end units.
Registration drift between the three dye passes. Each pass, cyan, then magenta, then yellow, has to land in exactly the same spot on the paper as the one before it. On a printer at this price point, sub-millimeter misalignment between passes is common, and it shows up exactly the way it did in our prints: a faint magenta or pink cast concentrated in the whites and light tones, where any registration error is most visible. It's a known characteristic of budget dye-sub engines, not a defect specific to our unit.
There's a third factor that's easy to miss: what you're actually sending to the printer. Printing from a phone's photo library over Bluetooth usually means printing whatever compressed, synced copy lives in that library, not the original file straight off the camera. If that photo was edited at any point (in Lightroom, for instance, or even just auto-enhanced by the phone), the printer's own color engine is applying its rendering on top of an image that's already been through one interpretation. Screens are also additive RGB and typically punched up in contrast and saturation for viewing; dye-sub output is subtractive CMY. Some mismatch between what you see on the phone and what comes out of the printer is close to guaranteed, and it's a bigger factor here than most people expect. If you already run your shots through a consistent edit before anything leaves your camera roll, my Lightroom presets are built around that kind of predictable, repeatable color, which is exactly the thing a cheap dye-sub engine has the hardest time reproducing faithfully.
How the Hi-Print stacks up against the alternatives
If quality is the priority, it's worth knowing what the step up actually costs, in both money and size.
| Polaroid Hi-Print | Canon SELPHY CP1500 | Canon SELPHY Square QX10 | |
|---|---|---|---|
| Print tech | Dye-sub, 4-pass | Dye-sub, 4-pass | Dye-sub, 4-pass |
| Max resolution | 291 x 291 dpi | 300 x 300 dpi | 287 x 287 dpi |
| Print size | 2.1 x 3.4 in | Up to 4 x 6 in | 2.7 x 2.7 in |
| Connectivity | Bluetooth | Wi-Fi, USB, AirPrint, memory card | Wi-Fi Direct |
| Weight | 255g | 850g | 450g |
| Price | Roughly $100 to $140 | Roughly $140 | Roughly $230 to $250 |
The resolution numbers alone don't explain a quality gap since they're all in the same 287 to 300 dpi range. What actually separates the CP1500 is the bigger print size, the built-in 3.5-inch screen for previewing before you commit a sheet, and more input options that let you skip the phone-library detour entirely (memory card and USB both bypass the recompression issue above). The Square QX10 costs meaningfully more than either for a print size closer to the Hi-Print's, which mostly buys you Canon's registration tolerances and app ecosystem rather than a resolution advantage.
None of these, including the Canon options, are going to compete with an actual photo lab. Lab prints use continuous-tone processes with far tighter color management and profiling than any consumer dye-sub engine, which is exactly why our side-by-side against a lab print looked the way it did in the video.
Watch the actual test
The full unboxing, the Bluetooth pairing, and the print-by-print reactions as the quality issue became obvious are all in the video below.
Who this printer is actually for
If you want prints you can stick in a journal, hand to a kid, or slap on a laptop lid within a minute of taking the photo, the Hi-Print does that job well. It's small, it's fast, and the prints hold up physically. What it isn't built for is being your archive-quality output for the photos that matter most, the ones you'd want printed for a scrapbook or framed. For that, a professional lab print or a proper photo printer with a larger format is still the better call, and honestly, still worth the extra step even if it means the print doesn't come out of your pocket.
We'll keep using ours for the casual stuff. But if you're deciding whether to buy one expecting lab-quality results, that's the expectation to adjust before you order it, not after.
Have you tried one of these pocket dye-sub printers? Did you get the same color shift we did, or did we just get unlucky with this unit? Let me know in the comments of my YouTube video.
Share:
Synology vs. UGREEN vs. Mac Mini: The Boring Storage Decision I Can't Put Off Anymore
The Best Photo Locations in Helsingborg (and When the Light Actually Works)