
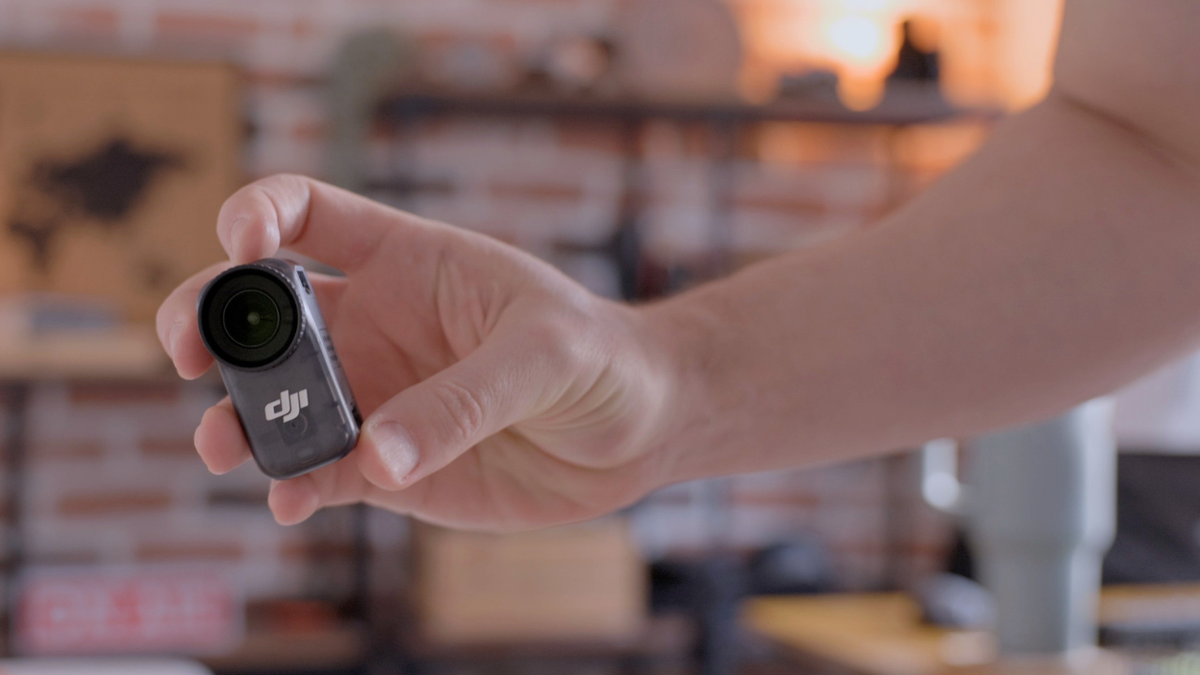
The DJI Osmo Nano for Photographers: What the Spec Sheet Doesn't Tell You
Phone mounts are terrible. I've known this for a while.
For street photography and POV vlogging, my only real option was one of those necklace mounts. The kind that makes you look like you're walking around with a small television strapped to your chest. Heavy, clunky, impossible to forget you're wearing it.
So when DJI announced the Osmo Nano, (52 grams, magnetic mount, 4K) I bought one immediately. Paid with my own money, no sponsorship involved.
What I want to do here is something a bit different from your typical gear review. The spec sheet from DJI is impressive on paper. But specs don't tell you what it actually feels like to use this thing alongside a Canon R6 Mark II, inside a pitch-black aquarium in Copenhagen, in the middle of a Swedish storm. That's what this post is for.
The video, which you'll find embedded below shows you the footage. This post explains what was actually happening behind the camera.
What DJI says on paper
Let's start with the numbers, because they're genuinely interesting for a camera this size.
The Osmo Nano camera module weighs just 52g and measures 57.3 × 29.5 × 28mm. For context, that's roughly the size of a lighter. It houses a 1/1.3-inch sensor capable of capturing 35-megapixel stills through an f/2.8 lens with a 143° field of view.
Video specs that matter for content creators:
- 4K (16:9) up to 60fps, 4K (4:3) up to 50fps
- 10-bit D-Log M color profile and 13.5 stops of dynamic range
- Slow motion up to 4K/120fps and 1080p/240fps
- RockSteady 3.0 stabilization plus HorizonBalancing up to ±30°
- Maximum bitrate of 120 Mbps
Battery life is where things get interesting. DJI rates the camera alone at 90 minutes and the camera paired with the Vision Dock at 200 minutes — though those numbers are based on 1080p/24fps in a controlled environment. Real-world 4K use is a different story, which I'll get to.
The modular system is the real design story here. The Multifunctional Vision Dock is a 1.96-inch OLED touchscreen that acts as both a control monitor and a fast-charging dock. The two pieces connect magnetically, and the camera is waterproof down to 10 meters on its own, with IPX4 splash resistance when paired with the Vision Dock.
One spec that stands out specifically for video creators: the ability to connect DJI wireless microphone transmitters directly to the Nano without needing a separate receiver, capturing two audio sources simultaneously. If you're already in the DJI ecosystem for audio, that's a meaningful advantage.
What the spec sheet doesn't prepare you for
The field of view is genuinely wide
I shoot my main content on a Canon R6 Mark II, usually with a 24-70mm lens. Switching to a 143° field of view is a different world. At arm's length, this camera captures an almost absurd amount of environment, like walls, ceiling, and everything around you.
That's great for vlogging. It means you don't have to frame carefully; the camera just... gets it all. But it also means the "action camera look" is immediately obvious if you don't adjust the default settings.
The 4:3 open gate format is more useful than it sounds
One of the first things I noticed was the option to shoot in 4:3 aspect ratio. This is essentially an open gate mode as you're recording a taller, squarish frame that gives you flexibility in post. From a single 4:3 file, you can crop a standard 16:9 frame for YouTube or a vertical 9:16 clip for Reels and Shorts without losing resolution.
In practice, though, I switched back to 16:9 for most shooting. The cropping workflow added an extra step in editing that I didn't want to manage every time.
The default sharpness will betray you
Out of the box, the Osmo Nano applies heavy sharpening. It gives the footage that unmistakable action camera look. Crisp in a way that immediately reads as "not a cinema camera." If you're shooting this alongside mirrorless footage and trying to match the two in post, that default sharpness is a problem.
These are the settings I landed on after testing:
| Setting | Value |
|---|---|
| Aspect Ratio | 16:9 |
| Color Profile | D-Log M |
| Sharpness | -2 |
| Noise Reduction | -1 |
| Bitrate | High |
With D-Log M enabled, matching the footage to my Canon in post became significantly more manageable. The image softens in a way that looks intentional rather than processed.
The real-world battery test
DJI's 200-minute figure is measured at 1080p/24fps with the screen off and Wi-Fi disabled. Under real shooting conditions in 4K with the screen active, expect less.
Here's what I actually got: shooting from around 11 AM to 6 PM across an aquarium visit, an IKEA trip, and an outdoor walk in a storm. Intermittent use, not continuous. I ended the day with 18% battery on the camera and 7% on the Vision Dock. Over 70 gigabytes of 4K footage generated across that time.
That's genuinely solid for a camera this size. It won't survive a full-day continuous shoot, but for the kind of grab-and-go use this camera is built for, it holds up well.
The mount situation: honest thoughts
The magnetic necklace mount is clever. You hide the magnetic plate under your shirt and the camera clips to the outside. It holds securely and is the cleanest POV setup I've used, which was the whole reason I bought this thing.
It does sway slightly when you walk fast. That's worth knowing before you shoot.
The hat clip works, but the camera sits heavy at the front brim. Moving the mount to the side of the cap balances the weight better.
The suction cup? I wouldn't trust it on a moving vehicle. Fine for a stable window indoors.
One thing to know about the microphone
The camera body is so small that it's easy to accidentally cover the built-in mic ports with your fingers while holding it. In calm conditions the internal audio is decent. In wind and I tested this during Storm Dave moving through Sweden. You have to be deliberate about your grip or you'll muffle the recording.
The Osmo Audio direct microphone connection, which lets you pair wireless transmitters without a receiver, is the real audio solution for serious use. The internal mics are fine for casual vlogging, but if audio quality matters for your content, plan accordingly.
See it in action
Everything above explains the context. The footage in the aquarium low-light test, the side-by-side with the R6 Mark II, the storm audio — is in the video below.
If you want to see the Nano in action across three countries: Spain, Brazil, and Sweden. I also made a blog post and a video breaking down the five reasons I keep reaching for it over my mirrorless setup. That post covers the real-world travel experience: chest mounts through São Paulo streets, battery life on a full day out, and why the mounting ecosystem is the part nobody talks about enough.
Read: 5 Reasons I Keep Reaching for the DJI Osmo Nano →
Who this camera is actually for
The DJI Osmo Nano is a strong tool if you fit a specific profile: you shoot on a mirrorless camera and want a lightweight second angle for POV or vlogging without carrying a full action camera setup. The D-Log M workflow and the high bitrate give you enough to work with in post, and the magnetic system genuinely solves the "how do I mount this" problem in a way that phone mounts never did.
It won't replace a full-sized or full-frame camera, but that's not the expectation here. It's a complement, not a replacement. And for that job, it's very good at what it does.
Worth mentioning what it complements, too. On the main-camera side, my R6 Mark II now rides on the DJI RS 5 gimbal for client work, and that post covers the research I had to do myself because DJI's app tutorials weren't there yet. Same honest treatment as this one: what works, what doesn't, and what to know before delivery day.
The settings I listed above are where I'd start if you just unboxed one. Dial those in before your first real shoot. The defaults will work against you.
More footage comparisons and a deeper look at the color grading workflow coming in the follow-up video. Subscribe to the channel if you don't want to miss it.
What are you using for POV shots right now? And would you trust that suction cup on a car window? Drop it in the comments.
Share:
Why I Added a Field Monitor to My Canon R6 Mark II Setup (And What I Chose)