Why I Added a Field Monitor to My Canon R6 Mark II Setup (And What I Chose)
There's a specific frustration that creeps up when you're doing client work with a mirrorless camera.
You're trying to nail focus on something small. A product, a detail shot, a subject that the autofocus just isn't locking onto cleanly. You squint at the camera's built-in screen. It's tiny. It's covered in exposure data, histograms, and overlays. You think you've got focus. You get home, pull the files, and you didn't.
That kept happening to me. So I fixed it.
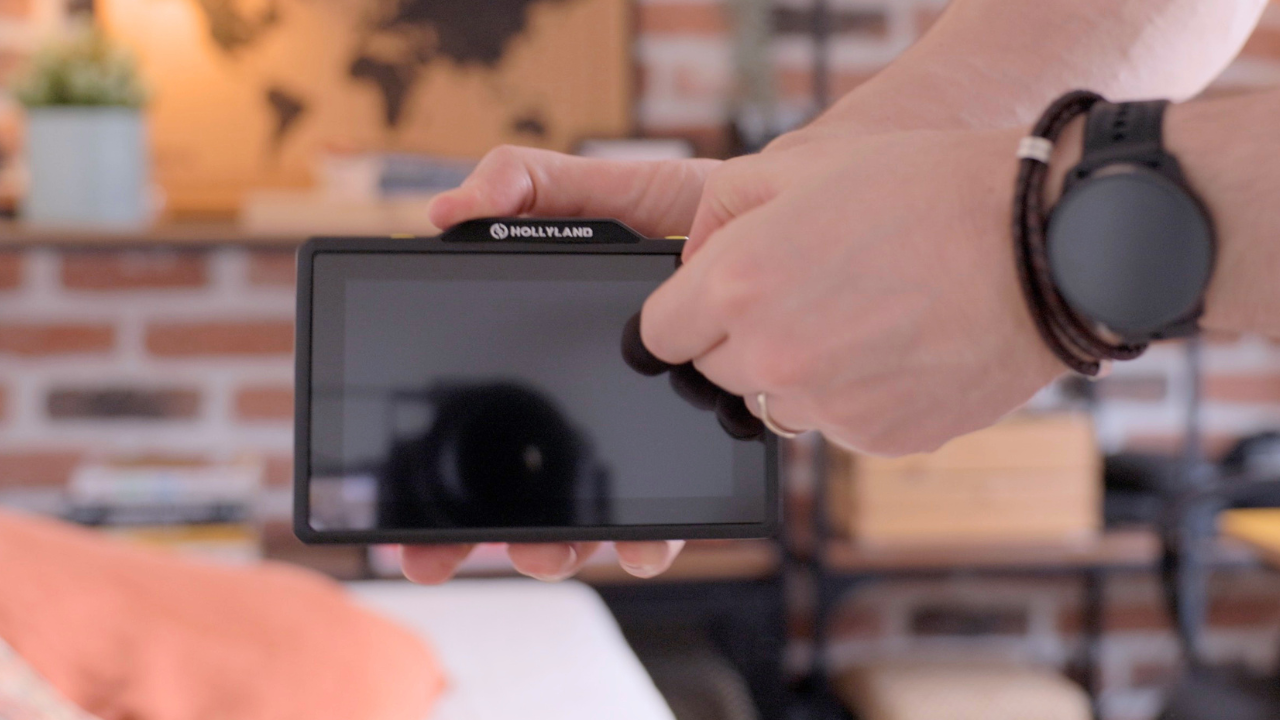
I ordered the Hollyland Pyro 5. A 5.5-inch wireless field monitor that doubles as a transmitter, receiver, and proxy recorder. Paid for it myself. No sponsorship involved.
This post covers what the Pyro 5 actually does, how I'm using it with my Canon R6 Mark II and RF 24-70mm, and which tools inside it are genuinely useful versus which ones I'll probably never touch. The full unboxing and hands-on walkthrough is in the video below.
What the Pyro 5 actually is
On paper, the Hollyland Pyro 5 is a lot of things at once, and that's both its strength and its potential source of confusion when you first start using it.
The core specs:
| Feature | Detail |
|---|---|
| Screen | 5.5-inch 1920×1080 touchscreen |
| Brightness | 1,500 nits (readable in direct sunlight) |
| Wireless range | Up to 400m line-of-sight |
| Latency | 60ms (Smooth mode) / 75ms (HD mode at 12 Mbps) |
| Inputs | HDMI + SDI, with loop-out on both |
| Dual-band | 2.4GHz / 5GHz with auto frequency hopping |
| Proxy recording | Direct to SD card or USB, with timecode sync |
| Camera control | Touchscreen adjustment of shutter, aperture, ISO, white balance, focus mode |
| RTMP streaming | YouTube Live, Twitch, TikTok, Zoom |
| Weight | 0.69 kg |
The wireless side of it. One transmitter sending to up to four receivers simultaneously. It is built for multi-person productions. Film sets, live events, ENG shoots. For solo client work like mine, most of that won't apply. But the monitor side of it? That's exactly what I needed.
Connecting it to the Canon R6 Mark II
One thing worth knowing upfront if you're a Canon shooter: the R6 Mark II still uses micro HDMI. So you'll need a micro HDMI to HDMI cable to connect to the Pyro 5. It's a small annoyance, but it's the reality of this camera until I upgrade to the newer models of Canon with full-size HDMI.
Once connected, the Pyro 5 takes over the monitoring role entirely. The camera's built-in screen turns off when the HDMI cable is plugged in. You're working from the Pyro 5's display only, which is fine. The whole point is that it's bigger and more useful.
The touchscreen interface is intuitive. Tap once to see Pyro 5's own menus. Tap again to see your camera's settings overlaid. It's a clean toggle.
One thing I'm still working out: whether you can keep both the camera screen and the Pyro 5 active simultaneously. If you know how to do that on the R6 Mark II — drop it in the comments. Being able to use the touchscreen for focus pulling while monitoring on the Pyro 5 would be ideal.
The tools I'll actually use
The Pyro 5 comes loaded with image analysis tools. Here's my honest breakdown of what's useful for solo client work and what's overkill.
Focus peaking — the reason I bought this
This is the main one. Focus peaking highlights the sharpest edges in your frame in a color overlay (red, green, or white — your choice). On a 5.5-inch screen, it's dramatically easier to see than on the R6 Mark II's built-in display.
One quirk I noticed straight away: the peaking also catches the rule-of-thirds grid lines and other UI overlays, since it's highlighting whatever is sharpest on the screen, including elements that aren't part of your actual image. The fix is probably to remove those overlays from the camera output and rely on the Pyro 5's own grid tools instead. Still working through that.
Sensitivity matters too. Set it too high and everything lights up. It stops being useful. I'm running it low, close to the minimum, which gives a much more accurate read of what's actually in focus.
False color — new territory for me
I've never used false color before, and the Pyro 5 is making me start. The scale maps exposure values to colors: pink or salmon for correct skin tone exposure (around 70 IRE), red for overexposed, purple for underexposed. For client work where accurate skin tone exposure matters, this is genuinely useful. More precise than eyeballing the histogram.
Zebras and waveform
Both are there and both work as expected. I've been using the histogram on camera for exposure up to now, but the waveform on a larger screen is easier to read quickly. Zebras I'll use mainly to protect highlights and skin tones from overexposure.
The tools I probably won't use
Vector scope, useful for broadcast color work, less relevant for the kind of client shoots I do. The anamorphic de-squeeze feature is there if you shoot anamorphic lenses, which I don't. Crosshatch grids I haven't found a use for yet.
The client sharing feature I didn't expect to use this much
Here's something I didn't anticipate finding useful: the HollyView app.
The Pyro 5 broadcasts its own Wi-Fi signal. Anyone on set, a client, a creative director, an art director can download the free HollyView app, connect to the Pyro 5's network without needing an account or subscription, and see exactly what you're recording on their phone in real time. Minimal lag.
In practice this is a genuinely useful tool for client work. Instead of constantly showing people the camera screen or explaining what you're capturing, they can just watch along on their own device. It changes the dynamic on set.
The unboxing, the full interface walkthrough, and the live first test on my Canon R6 Mark II setup are all in the video above — including the moment I accidentally flipped the image and couldn't work out how to flip it back.
A few honest notes on the hardware
The antennas are a mild annoyance. They clip on easily but don't fold or store against the body of the monitor. When you're packing up and moving between locations, you're carrying loose antennas that have nowhere obvious to live. It's a minor thing but something to be aware of. Especially if you're the kind of person who loses small accessories.
The fan is audible. Not loud, but present. Whether that matters depends entirely on your audio setup. If your mic is on camera and pointed away from the monitor, you likely won't pick it up. If you're working in a quiet environment with a sensitive mic nearby, worth keeping in mind.
The box doesn't include a battery. The Pyro 5 runs on L-series batteries, which aren't included. I'm using a SmallRig battery. Factor that into your total cost if you're pricing this out.
Is it worth it for solo client work?
If your main pain point is focus accuracy. Especially when shooting subjects that the camera's autofocus doesn't handle confidently, then yes. The jump from a 3-inch camera screen to a 5.5-inch 1500-nit display with focus peaking is not subtle. It's a meaningful improvement to how you work on set.
The wireless transmission, the multi-receiver broadcast, the RTMP streaming. Those features are there if your work grows into them. For now, I'm using it as a very good field monitor with a client-sharing bonus built in.
Since publishing this, the Pyro 5 has also found a second home in my kit: mounted on the cold shoe of the DJI RS 5's briefcase handle. Monitoring focus while moving on a gimbal was exactly the kind of situation this monitor was made for, and I've written up everything I had to research about that gimbal before pairing the two.
Whether I'll also get serious use out of the false color and waveform tools depends on how much I put into learning them. The Pyro 5 is making me want to.
More on how this setup actually performs across real client shoots coming in a follow-up video. Subscribe to the channel if you want to catch that one.
What monitor are you running with your mirrorless setup? And has anyone figured out how to keep the R6 Mark II screen active while the Pyro 5 is connected? Genuinely asking — drop it in the comments.
Share:
The DJI Osmo Nano for Photographers: What the Spec Sheet Doesn't Tell You
5 Reasons I Keep Reaching for the DJI Osmo Nano (And I've Taken It Across Three Countries to Prove It)